uniapp 本地离线打包配置
前言
由于 uniapp 云打包的限制,等待排队这个过程非常煎熬,在本地开发的时候,有些功能需要打包后调试,所以需要本地离线打包。
前置条件
-
安装 hbuildx 工具
-
安装 android studio 官网
-
app 离线 sdk 下载:最新 android 离线 sdk 下载
-
hubildx 3.1.10 版本起需要申请 Appkey,具体请点击链接
-
生成好 keystore app 签名文件 如何生成?
注意:hbuildx 工具版本需要与离线 sdk 版本一致
步骤
-
下载离线 sdk 并解压

提示:这里我们只需要使用到 SDK 与 HBuilder-Integrate-AS 目录
-
在 android studio 中打开 HBuilder-Integrate-AS 目录 (注意拷贝到本地后打开) ide 目录切换到 project files 模式下

-
由于网络原因下载 gradle 源速度过慢需要调整为国内镜像源 打开 根目录/gradle/wrapper/gradle-wrapper.properties 文件,修改为阿里镜像源(这里我使用的是阿里镜像源,可自行选择其他源)

设置完成之后重启 android studio
-
配置安卓工程打包配置文件
4.1 打开 根目录/simpleDemo/build.gradle 文件,修改以下配置
apply plugin: 'com.android.application'

android {
    compileSdkVersion 35 // sdk 版本
    buildToolsVersion '35.0.0' // sdk 版本
    namespace 'com.android.simple' // apk包签名 建议修改成部署域名反写 比如 www.demo.com -> com.demo.www
    defaultConfig {
        applicationId "com.android.simple" // 与namespace保持一致
        minSdkVersion 21 // 最低兼容版本
        targetSdkVersion 35 // 目标版本
        versionCode 1 // apk版本号
        versionName "1.0" // apk版本名
        multiDexEnabled true
        compileOptions {
            sourceCompatibility JavaVersion.VERSION_21 // jdk版本
            targetCompatibility JavaVersion.VERSION_21 // jdk版本
        }
    }
    signingConfigs {
        config {
            keyAlias 'demo' # 签名文件别名
            keyPassword '123456' # 签名文件密码
            storeFile file('demo.keystore') # 签名文件路径
            storePassword '123456' # 签名文件密码
            v1SigningEnabled true
            v2SigningEnabled true
        }
    }

    buildTypes {
        debug {
            signingConfig signingConfigs.config
            minifyEnabled false
            proguardFiles getDefaultProguardFile('proguard-android-optimize.txt'), 'proguard-rules.pro'
        }
        release {
            signingConfig signingConfigs.config
            minifyEnabled false
            proguardFiles getDefaultProguardFile('proguard-android-optimize.txt'), 'proguard-rules.pro'
        }
    }
    aaptOptions {
        additionalParameters '--auto-add-overlay'
        ignoreAssetsPattern "!.svn:!.git:.*:!CVS:!thumbs.db:!picasa.ini:!*.scc:*~"
    }
}

dependencies {
    implementation fileTree(dir: 'libs', include: ['*.aar', '*.jar'], exclude: [])
    implementation 'androidx.appcompat:appcompat:1.1.0'
    implementation 'androidx.localbroadcastmanager:localbroadcastmanager:1.0.0'
    implementation 'androidx.core:core:1.1.0'
    implementation "androidx.fragment:fragment:1.1.0"
    implementation 'androidx.recyclerview:recyclerview:1.1.0'
    implementation 'com.facebook.fresco:fresco:2.5.0'
    implementation "com.facebook.fresco:animated-gif:2.5.0"
    implementation 'com.github.bumptech.glide:glide:4.9.0'
    implementation 'com.alibaba:fastjson:1.2.83'
    implementation 'androidx.webkit:webkit:1.5.0'
}
4.2 打开 根目录/simpleDemo/src/main/AndroidManifest.xml 文件,修改android:value配置
<?xml version="1.0" encoding="utf-8"?>
<manifest xmlns:android="http://schemas.android.com/apk/res/android">

    <application
        android:allowBackup="true"
        android:allowClearUserData="true"
        android:icon="@drawable/icon"
        android:label="@string/app_name"
        android:largeHeap="true"
        android:extractNativeLibs="true"
        android:supportsRtl="true">
        <activity
            android:name="io.dcloud.PandoraEntry"
            android:configChanges="orientation|keyboardHidden|keyboard|navigation"
            android:label="@string/app_name"
            android:launchMode="singleTask"
            android:hardwareAccelerated="true"
            android:theme="@style/TranslucentTheme"
            android:screenOrientation="user"
            android:exported="true"
            android:windowSoftInputMode="adjustResize" >
            <intent-filter>
                <action android:name="android.intent.action.MAIN" />
                <category android:name="android.intent.category.LAUNCHER" />
            </intent-filter>
        </activity>
        <activity
            android:name="io.dcloud.PandoraEntryActivity"
            android:launchMode="singleTask"
            android:configChanges="orientation|keyboardHidden|screenSize|mcc|mnc|fontScale|keyboard|smallestScreenSize|screenLayout|screenSize|uiMode"
            android:hardwareAccelerated="true"
            android:permission="com.miui.securitycenter.permission.AppPermissionsEditor"
            android:screenOrientation="user"
            android:theme="@style/DCloudTheme"
            android:exported="true"
            android:windowSoftInputMode="adjustResize">
            <intent-filter>
                <category android:name="android.intent.category.DEFAULT" />
                <category android:name="android.intent.category.BROWSABLE" />
                <action android:name="android.intent.action.VIEW" />
                <data android:scheme=" " />
            </intent-filter>
        </activity>
        <meta-data
            android:name="dcloud_appkey"
            android:value="开发者需登录https://dev.dcloud.net.cn/申请签名" /> <!-- uniapp 开发者申请的签名 appkey  -->

    </application>

</manifest>
4.3 打开 根目录/simpleDemo/src/main/res/values/strings.xml 文件,修改app_name配置
<resources>
    <string name="app_name">app应用名称 <!-- app应用名称 --> </string>
</resources>
- 替换工程 app 打包文件
打开 根目录/simpleDemo/src/main/assets/app/ 目录,将需要打包的文件替换到该目录下

这里我们安卓工程基本配置完成,如果项目使用了 其他模块及三方 SDK 配置 请自行查阅 uniapp 官方文档配置 文档
- 构建离线 apk
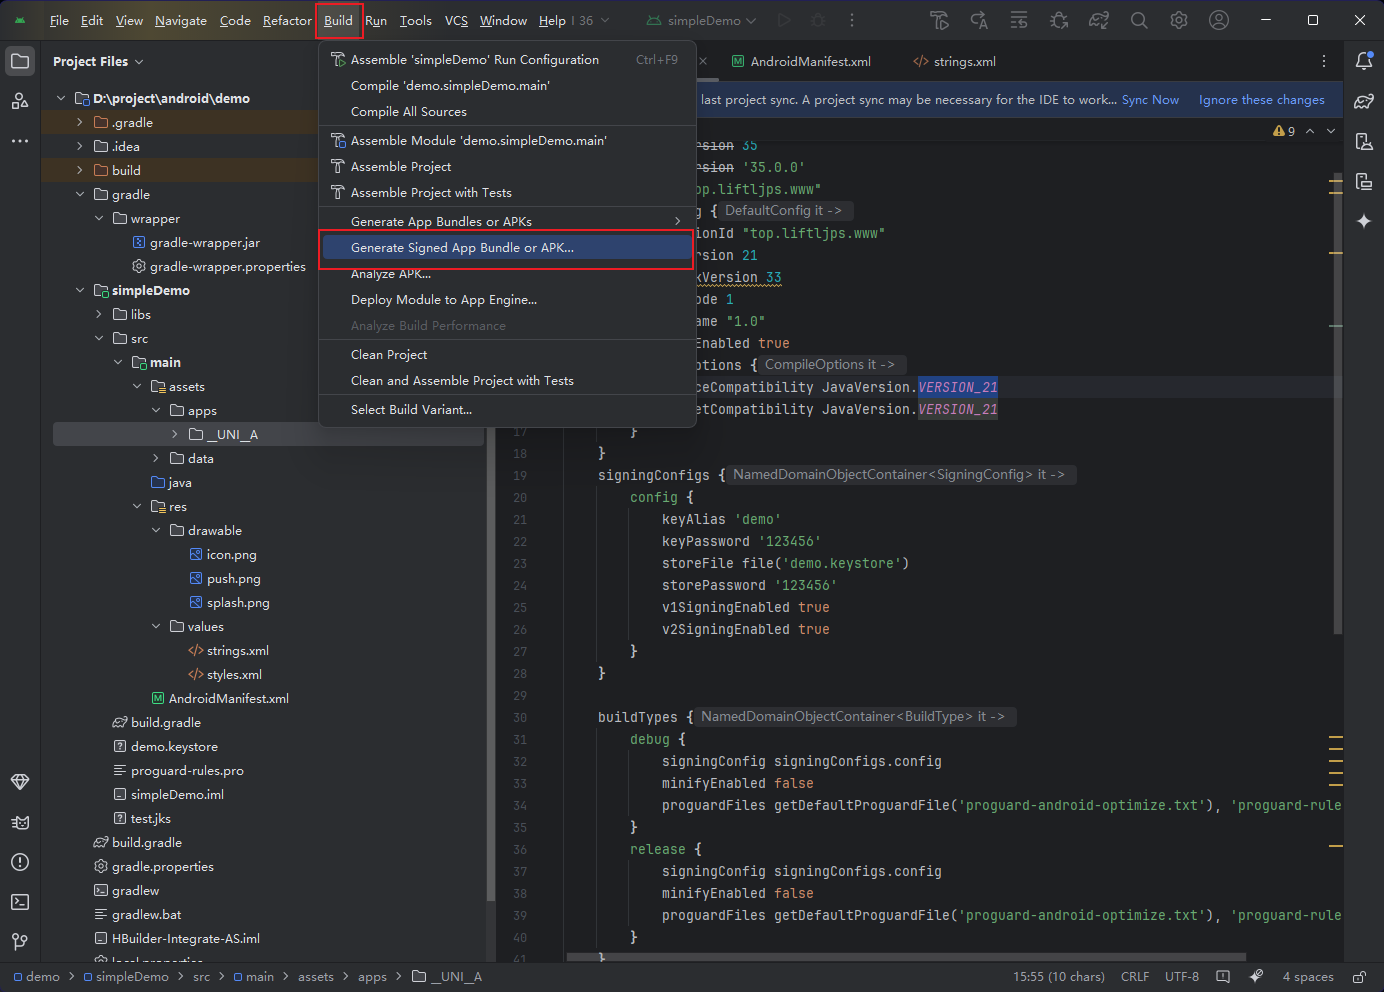


-
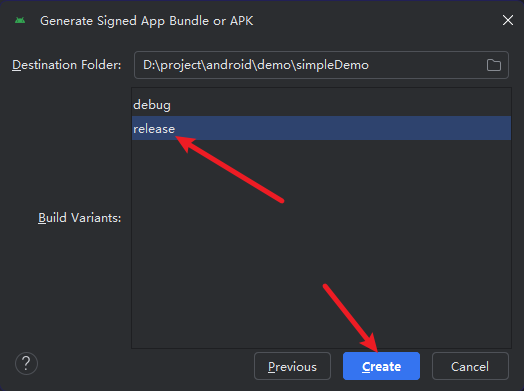
打包成功
打包成功后会生成一个 apk 包,该 apk 包在 根目录/simpleDemo/release/ 目录下
